Creating and Maintaining Passenger Profiles (ACE and ACI eManifest)
|
🔖 This article is part of the BorderConnect Software User Guide |
>This guide offers instructions on creating and maintaining passenger profiles in BorderConnect eManifest software. It assumes that you have an active software subscription with BorderConnect. If you are not presently set up with an account, please contact BorderConnect to get you set up.
Passenger profiles are used in BorderConnect to complete mandatory information fields for ACE Manifests and to indicate the driver for your own reference for ACI eManifests.
Once entered, the information in passenger profiles remains saved in BorderConnect. There is no need re-enter the information each time a passenger crosses on an ACE eManifest, for example. You would simply select the passenger for the manifest and the information would be loaded automatically.
Creating a New Passenger Profile
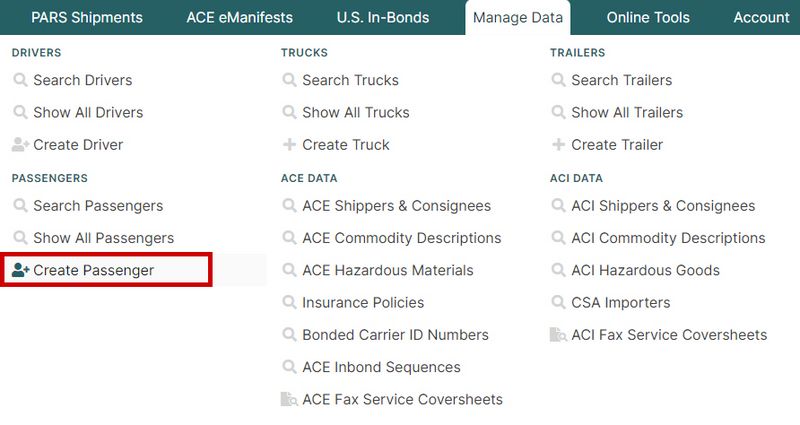
To begin creating a new passenger profile, select the option Create Passenger under the Manage Data menu.
This will bring you to the Add Passenger Page, where all of the information for the passenger can be entered.
Once you have finished entering the information on the page, click the Save button at the top left. This will bring you to the Passenger Details Page, which displays an overview of the passenger profile.
Entering Travel Documents for Profiles used on ACE eManifests
If your passenger profile will be used for ACE eManifests, your next step will be to enter a travel document. Passengers will normally only require one travel document to be entered, preferably a passport.
To begin click on the Add Travel Document button and enter the information for the document. Once finished, click save to return to the passenger details page. If you have entered a Driver's License as your travel document, you will need to add a second document by clicking Add Travel Document again. Otherwise your profile is finished.
Maintaining Existing Passenger Profiles
To manage your existing passenger profiles, bring up the Passenger Search Page by selecting 'Search Passengers' from the Manage Data menu.
By default this page will display a list of all passenger profiles for your account, so right away it can be handy if you are looking to check which passengers you have already entered. Using the search options can also be useful for this if you are checking on a particular list of passengers.
If you want to update or view an existing passenger profile, you can access it from here by finding the passenger you want and clicking View. This will bring you to the Passenger Details Page for that passenger. The search options are also useful for narrowing it down to the passenger you are looking for if you have a lot of passenger profiles on your account.
If you want to delete an existing passenger profile, this can be done by finding the passenger you want and clicking Delete.
