Creating and Submitting a New ACI eManifest (ACI eManifest)
| This article is part of the BorderConnect ACI eManifest Guide |

This guide offers step by step instructions on creating a new ACI eManifest and submitting it to CBSA using BorderConnect ACI eManifest software. It assumes that you have an active software subscription and that your Carrier Code is already registered for ACI with CBSA. If you are not yet registered, please refer to the registration instructions.
Step 1
On the top menu bar, under 'ACI eManifests', select 'Start New ACI eManifest'.
Step 2
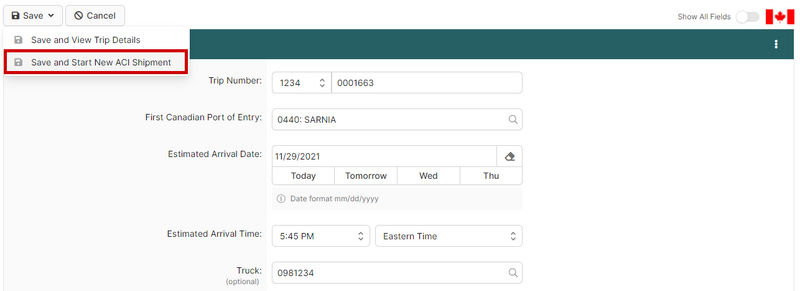
Enter the information on the Start New ACI eManifest Page, including your trip number, port of entry, ETA, driver, truck and trailer, and click 'Save and Start New ACI Shipment' when finished.
Step 3
Enter the information on the Start New ACI Shipment Page.
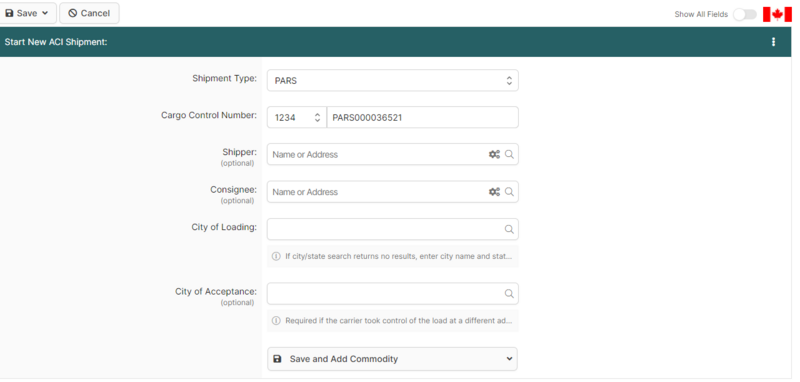
For uncommon shipment data elements, such as marking a shipment as consolidated freight, special instructions, or assigning a unique consignment reference number, click the Show link at the bottom of the shipment details in the legend.
Step 4
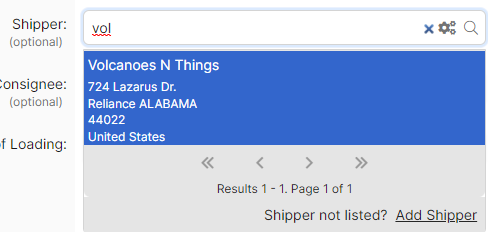
On the ACI Shipment Details Page you will enter the shipper for this shipment by using 'Quick Assign Shipper' for shippers that you've used before or use the 'Add New Shipper' shortcut to enter a new one.
Step 5
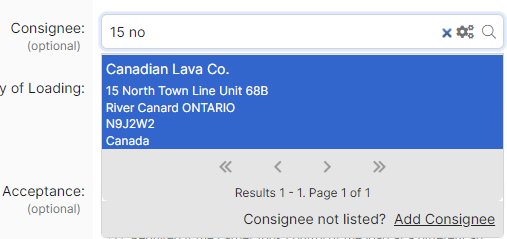
Select the consignee for this shipment by using 'Quick Assign Consignee' for consignees that you've used before or 'Add New Consignee' to enter a new one.
Optional: How to Add a 3rd Party or Delivery Destination
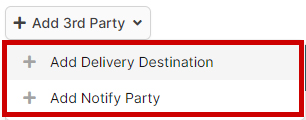
If you are delivering to a destination other than the consignee, or if your consignee address lists PO Box instead of a physical address, it is mandatory to enter a Delivery Destination. Otherwise it is not required. To add a Delivery Destination from the Start New ACI Shipment page, navigate to the top left and hit 'Save'. This will bring you to the ACI shipment details page, and select it under 'Add 3rd Party'. You may also enter a Notify Party in the same manner, but please note that adding a Notify Party is always optional.
Step 6
Add the commodity. To do so click on 'Save and Add Commodity'.
Step 7
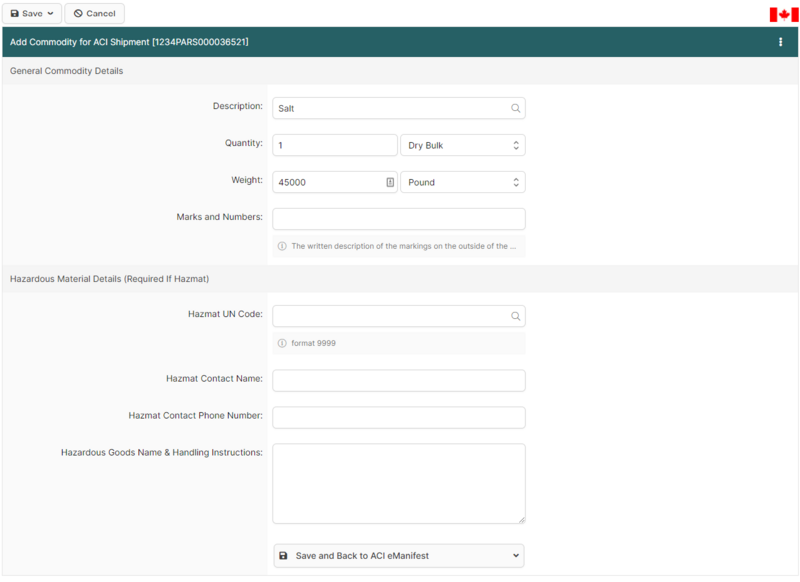
Enter the information on the Add/Edit Commodity for ACI Shipment Page. If you have any additional commodity information for this shipment that is not covered by your previous entry, you may click 'Create Commodity' again to add additional commodities to the shipment. Otherwise, this shipment is complete. Please note that it is usually recommended to provide a general description, total quantity and weight that covers all of the goods on the shipment at once, rather than entering multiple commodities separately. When you have entered all the required fields, click 'Save and Back to ACI eManifest'.
Step 9
Click 'Save and Back to ACI eManifest' to return to the ACI eManifest Details Page.
Step 10
If you have additional shipments to add to the manifest, navigate to the 'Create New Shipment' button below the driver information. Please note that all shipments on the truck must be accounted for on one manifest.
Step 11
Transmit the manifest to CBSA. If your manifest is complete with all shipments aboard entered you are ready to send it to CBSA. To do so, at the top of the eManifest Details page click 'Sync with CBSA'. The 'Current Status' should update from 'Draft' to 'Transmitted to CBSA' and you should see the send request for the manifest and the appropriate number of shipments listed on your History/Status Messages.

Step 12
Check back to verify that the manifest is accepted by CBSA. Current response times vary but the average seems to be around 2-4 minutes. It is important to come back to your manifest to make sure that it was received and accepted by Customs. You can do so either by leaving the manifest page open and using your browser's refresh button, or by looking up the manifest on the ACI eManifest Search Page and selecting 'View'. The system will also leave a link to the last manifest and shipment that you viewed, which allows you to easily return if you need to access another part of the system. Once your manifest is accepted, the 'Current Status' will update to 'On File with CBSA' and you will see an accepted response for the trip and the appropriate number of shipments. This means your manifest is now accepted and on file with CBSA.

Step 13
Verify that all PARS shipments aboard are cleared by the customs broker. If you are also a user of BorderConnect PARS you will see acceptance messages in your History/Status Messages. You will also notice that individual shipments' statuses will update to 'On File With Transaction Numbers' as they are cleared, and that the trip's 'Current Status' will follow suit once all PARS listed on the trip are cleared by the broker. If you do not use BorderConnect's PARS checking software you can verify a PARS is cleared by the broker using other methods, including checking the broker's website, calling the broker directly, or other PARS checking software.

| In order to comply with ACI eManifest requirements you are required to ensure that both your manifest and the broker clearance on any PARS shipments are on file with CBSA for at least one hour before the driver arrives at the border. |

